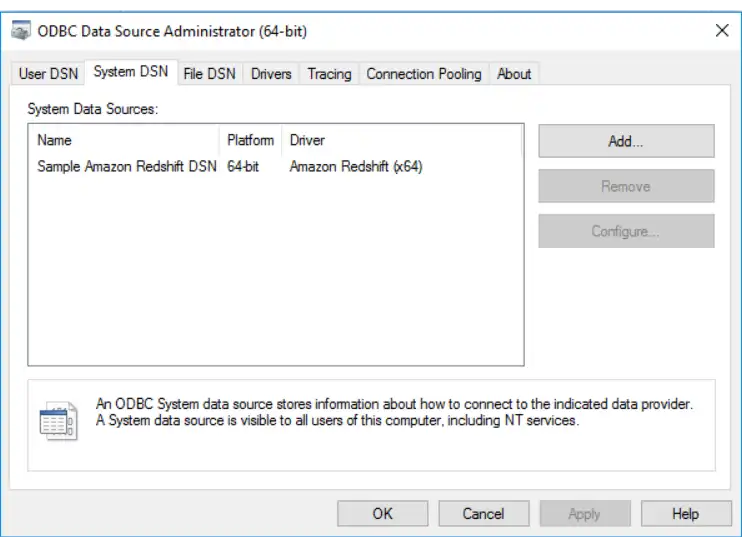
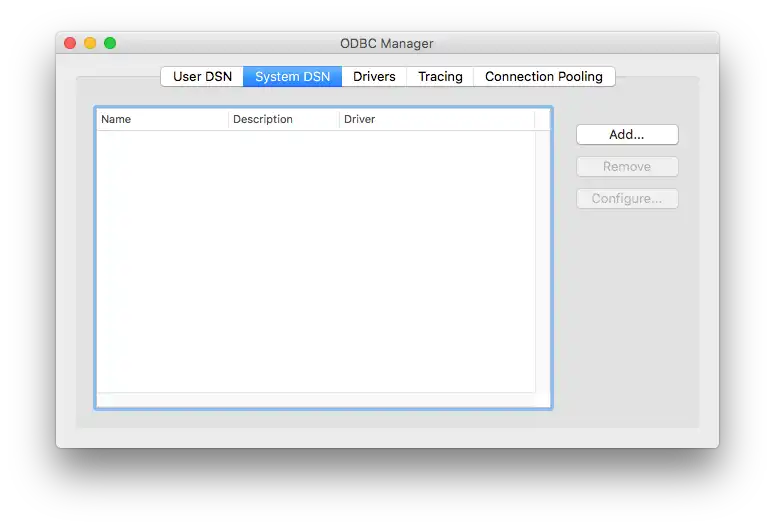
Create a System DSN
On this page
The following steps describe how to create a system Data Source
Name (DSN) for the BI Connector's mongosqld
process. A DSN is a saved configuration which
describes a database connection to be
used by an ODBC driver.
Once the DSN is created for the BI Connector, you can configure a wide
range of SQL clients and BI tools to use the DSN and import
data from MongoDB.
Prerequisites
Before creating a DSN, you should:
Install the BI Connector and configure it to connect to your replica set.
Note
This prerequisite doesn't apply if you are using BI Connector for Atlas.
Download and install Visual C++ Redistributable for Visual Studio 2015.
Download and install the MongoDB BI Connector ODBC Driver.
Install the BI Connector and configure it to connect to your replica set.
Note
This prerequisite doesn't apply if you are using BI Connector for Atlas.
Download and install the MongoDB BI Connector ODBC Driver.
Install the BI Connector on Red Hat Enterprise-based Linux or Debian-based Linux and configure it to connect to your replica set.
Note
This prerequisite doesn't apply if you are using BI Connector for Atlas.
Download and extract the MongoDB BI Connector ODBC Driver for your platform.
Procedure
Select a MongoDB BI Connector ODBC Driver from the list of available drivers.
Select either the MongoDB ODBC ANSI Driver or the MongoDB ODBC Unicode Driver, then click OK.
Note
The ANSI ODBC driver offers maximum performance but has a limited character set. The Unicode ODBC driver supports a wider character set but may be slightly less performant as a result.
Fill in the necessary form fields.
Click the Details button to expose the lower half of the form.
The following form fields are required:
Field Name | Description |
|---|---|
Data Source Name | A name of your choice. |
TCP/IP Server | Address of the server where your
mongosqld process is running. If you have enabled
BI Connector on MongoDB Atlas, you can find the
hostname of the server where mongosqld is running
in the connection information
for your cluster. |
Port | Port number of your mongosqld
process. |
Database | The name of the database to connect to, e.g. test. |
(Optional) If authentication is enabled, provide connection information.
The following fields are required when running with
--auth enabled or when connecting to an
BI Connector for Atlas instance.
Field Name | Description | |||||||||
|---|---|---|---|---|---|---|---|---|---|---|
User | Username of the MongoDB user who is authenticated to use your target database. You can specify the following authentication options after your username as URI-style query parameters:
ExampleTo authenticate as user ExampleTo authenticate as user ExampleTo authenticate as user For more information about Kerberos configuration, see Configure Kerberos for BI Connector. | |||||||||
Password | The authenticated user's password. NoteYou can't use curly braces ( | |||||||||
Authentication | The default authentication method. When using the MongoDB BI Connector ODBC Driver, this field is not required. To use the authentication plugin in conjunction with
another ODBC driver, fill in this field with the
string |
(Optional) If TLS/SSL is enabled, fill in the TLS/SSL form fields.
Access the TLS/SSL form fields by clicking Details >>, then the SSL tab. The following parameters are available and may be required, depending on your TLS/SSL configuration:
Field Name | Description |
|---|---|
SSL Key | The location of the client/server key file. |
SSL Cert | The location of the client/server certificate file. |
SSL CA File | The location of the file containing a list of trusted
certificate authorities. |
SSL Cipher | The location of the file containing a list of permitted
ciphers. |
SSL Mode | Set to REQUIRED to require an encrypted channel. If an
encyrpted channel is not provided, the connection fails. |
RSA Public Key | The location of the PEM file that contains the RSA public key. |
Note
The BI Connector for Atlas uses TLS/SSL but does not require any TLS/SSL settings to be configured in your system DSN.
Launch ODBC Manager.
Note
ODBC Manager is included with the MongoDB BI Connector ODBC Driver.
Important
The 1.0.16 edition of ODBC Manager included with the MongoDB BI Connector ODBC Driver is not compatible with macOS Catalina or later versions of macOS. If you are on Catalina or a later version of macOS, download and install the latest version (1.0.19) of ODBC manager.
Select a MongoDB BI Connector ODBC Driver from the list of available drivers.
Select either the MongoDB ANSI ODBC driver or the MongoDB Unicode ODBC driver, then click OK.
Note
The ANSI ODBC driver offers maximum performance but has a limited character set. The Unicode ODBC driver supports a wider character set but may be slightly less performant as a result.
Add the necessary keywords.
Add a keyword value pair by clicking the Add button.
Modify the Keyword by double-clicking on it, entering the desired keyword, then pressing enter.
Modify the Value by double-clicking on it, entering the desired keyword, then pressing enter.
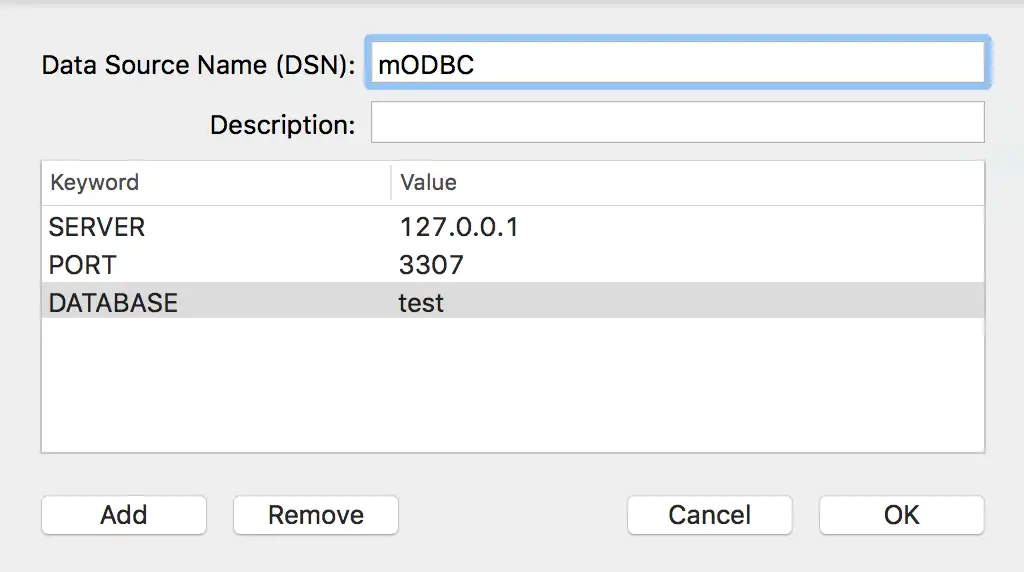
Using the procedure above, add the following keywords:
Keyword | Value |
|---|---|
SERVER | The hostname or IP address of the MongoDB Connector for BI host. ImportantUse |
PORT | |
DATABASE | The database to use after connecting. NoteRequired when connecting with Microsoft Excel. |
For the complete list of ODBC parameters, see Connector/ODBC Connection Parameters.
For example, your user DSN configuration should look similar to the following:
Note
Do not close the setup window. Proceed to the next step.
(Optional) If authentication is enabled, add the authentication keywords.
Add a keyword value pair by clicking the Add button.
Modify the Keyword by double-clicking on it, entering the desired keyword, then pressing enter.
Modify the Value by double-clicking on it, entering the desired keyword, then pressing enter.
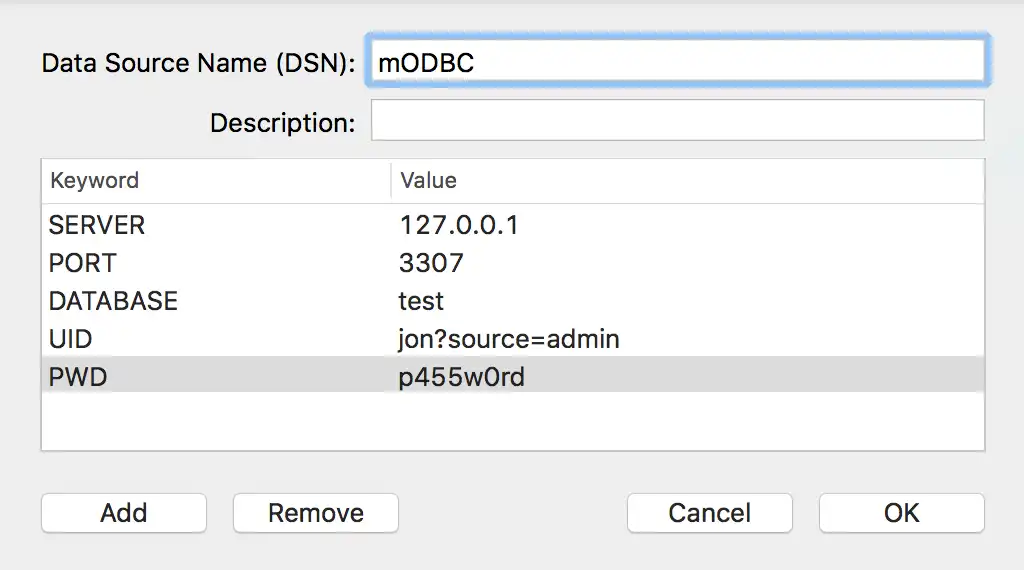
Using the procedure above, add the following keywords:
Keyword | Value | |||||||||
|---|---|---|---|---|---|---|---|---|---|---|
UID | The username for the user that can access the active MongoDB Connector for BI database. You can specify the following authentication options after your username as URI-style query parameters:
ExampleTo authenticate as user ExampleTo authenticate as user ExampleTo authenticate as user For more information about Kerberos configuration, see Configure Kerberos for BI Connector. | |||||||||
PWD | The password associated with the UID. NoteYou can't use curly braces ( |
For the complete list of ODBC parameters, see Connector/ODBC Connection Parameters.
For example, your user DSN configuration should look similar to the following:
(Optional) If TLS/SSL is enabled, add the TLS/SSL keywords.
Add a keyword value pair by clicking the Add button.
Modify the Keyword by double-clicking on it, entering the desired keyword, then pressing enter.
Modify the Value by double-clicking on it, entering the desired keyword, then pressing enter.
Note
The BI Connector for Atlas uses TLS/SSL but does not require any TLS/SSL settings to be configured in your system DSN.
Using the procedure above, add the following keywords depending on your TLS/SSL configuration:
Keyword | Value |
|---|---|
SSLKEY | The path to the .pem key file. |
SSLCERT | The path to the SSL certificate. |
SSLMODE | Set to REQUIRED. |
SSLCA | The path to the SSL certificate authority file. |
SSLCIPHER | The path to the file containing a list of permitted
ciphers. |
RSAKEY | The path to the PEM file containing the RSA public key. |
ENABLE_CLEARTEXT_PLUGIN | Set to 1 to enable cleartext authentication. |
Note
If you are connecting with Microsoft Excel, certificates must be
located in the /Library/ODBC/ directory.
For the complete list of ODBC parameters, see Connector/ODBC Connection Parameters.
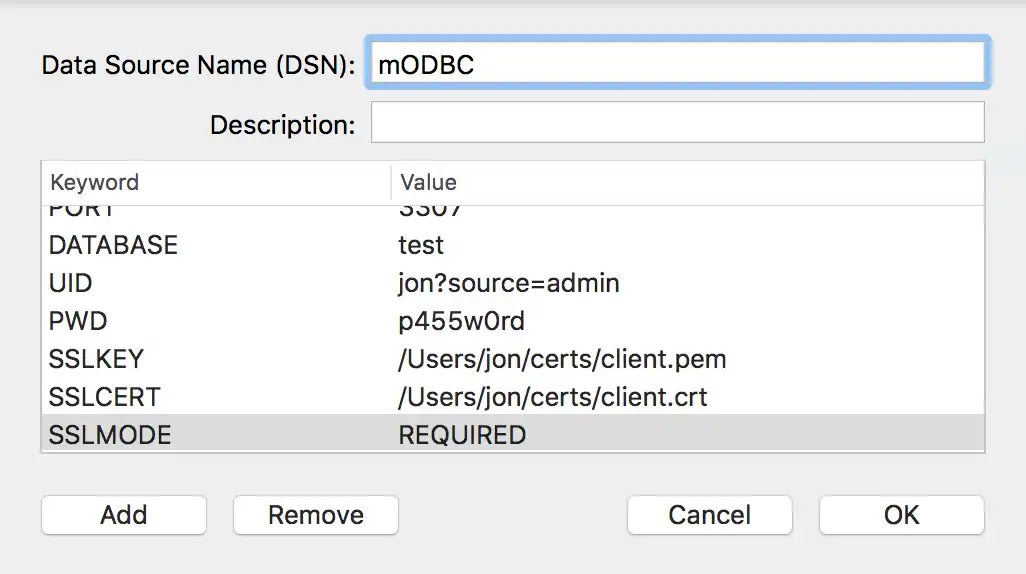
For example, your user DSN configuration should look similar to the following:
The following procedure has been tested with Ubuntu and RHEL, and should work in a similar fashion with other Linux distributions.
Create an odbc.ini file
The file /etc/odbc.ini defines your Data Source Names. Below is
an example odbc.ini file which is configured to use the
MongoDB BI Connector ODBC Driver with a DSN called MongoDBODBC. Replace all
necessary placeholder values with values for your system.
The file named libmdbodbca.so is the ANSI driver, and the
file named libmdbodbcw.so is the Unicode driver. Specify the
desired driver by setting the Driver parameter in your
odbc.ini file.
Note
The ANSI ODBC driver offers maximum performance but has a limited character set. The Unicode ODBC driver supports a wider character set but may be slightly less performant as a result.
[MongoDBODBC] DESCRIPTION = ODBC for MongoDB BI Connector DRIVER = /usr/local/lib/libmdbodbcw.so TRACE = Off TRACEFILE = stderr READONLY = yes SERVER = <server address> PORT = <port number> USER = <username> PASSWORD = <password> DATABASE = <dbname> ; optional SSL configuration SSLKEY = </path/to/.pem-key-file> SSLCERT = </path/to/ssl-certificate> SSLMODE = DISABLED|PREFERRED|REQUIRED SSLCA = </path/to/ssl-ca-list-file> SSLCAPATH = </path/to/ssl-ca-file-directory> SSLCIPHER = </path/to/ssl-cipher-file> RSAKEY = </path/to/rsa-public-key-file>
Note
All odbc.ini parameters are case-insensitive.
The previous example contains only one DSN, but it is possible to
include multiple DSNs in an odbc.ini file.
The following table describes the parameters used in the previous example.
Parameter | Description |
|---|---|
DESCRIPTION | Optional. Text description of the DSN. |
DRIVER | Path to ODBC driver file. |
TRACE | On or Off. Enable ODBC tracing. |
TRACEFILE | If ODBC tracing is enabled, the path to the file in which to
store the trace output. |
READONLY | yes or no. Enforce a read-only ODBC session. |
SERVER | Address of the server where a BI Connector
mongosqld instance is running. |
PORT | Port number of the mongosqld instance. |
USER | Username of the MongoDB user with permission to connect to
the mongosqld instance. |
PASSWORD | Password of the MongoDB user with permission to connect to
the mongosqld instance. |
DATABASE | Name of the MongoDB database to use. |
SSLKEY | Full path to an SSL key file to use for establishing a secure
connection. |
SSLCERT | Name of the SSL certificate file to use for establishing a
secure connection. |
SSLMODE | Accepted values are:
|
SSLCA | Full path to a file with a list of trust SSL Certificate
Authorities. |
SSLCAPATH | Full path to a directory that contains trusted SSL CA
certificates in PEM format. |
SSLCIPHER | Full path to the file containing a list of permitted
ciphers. |
RSAKEY | Full path to the PEM file containing the RSA public key. |
ENABLE_CLEARTEXT_PLUGIN | Set to 1 to enable cleartext authentication. |
For the complete list of ODBC parameters, see Connector/ODBC Connection Parameters.
Note
The BI Connector for Atlas uses TLS/SSL but does not require any TLS/SSL settings to be configured in your system DSN.
Your DSN is now ready to use. If you wish to test your DSN, proceed to step 3.
Install unixODBC
Install unixODBC with your preferred package manager.
On Ubuntu:
sudo apt-get install unixodbc
On RHEL:
sudo yum install unixODBC
Alternatively, you can download binaries from the unixODBC website.
